+001.jpg) Image 2.(Size aprox A4).
This sample was worked in traditional hand stitching in a Bargello/Florentine pattern using toning wools as per the colour study. The stitching was then overlaid by four silk rods which had again been dyed in the chosen colour scheme.
Image 2.(Size aprox A4).
This sample was worked in traditional hand stitching in a Bargello/Florentine pattern using toning wools as per the colour study. The stitching was then overlaid by four silk rods which had again been dyed in the chosen colour scheme.
 IMAGE 3 (A4 SIZE)
This is a repeat of one of my favourite decorated papers from the previous chapter which I used as inspiration for the following sample.
 IMAGE 4 ( SIZE 12X 10 cms.)
Work in progress. Making wool flowers to add to the design.
 IMAGE 5 ( SIZE SLIGHTLY LARGER THAN A4)
 IMAGE 6 (SIZE SLIGHTLY LARGER THAN A 5)
 IMAGE 5 ( SIZE SLIGHTLY LARGER THAN A4)
This was an experiment in trying to replicate the original decorated paper in stitch. I first made photocopies of the paper and then cut them up and used them to cover a piece of firm vilene.
The tree trunks were made from white satin which had been worked all over with corded pin tucks. The ridges of the pin tucks were then overworked with machine satin stitch in brown thread. Pieces were then cut up to represent groups of trees as in the original these were then temporarily glued in place on the fabric. The tree shapes themselves were made from a 'sandwich' of quilting wadding green satin and green organza . The sandwich was then stitched into a series of triangle shapes with a fine zig-zag edging. Before the shapes were cut out the whole piece was then worked with a series of pine tree shapes made by using the 'arrowhead' tailoring stitch on the machine . The triangles were then cut out and applied to the base on top of the trunks. The whole of the trees were then appliqued on using a flowing spiral machine stitch to give a more feathery edge to the outline. Scraps of textured green organza were then applied to bondaweb and appliqued to the foot of each group of tree trunks. The wool flowers were then cut from the net background and applied to the picture with a whisp of blue dyed silk tops.(Took 2 days to do but great fun!!!)
 IMAGE 6 (SIZE SLIGHTLY LARGER THAN A 5)
This was designed to be another interpretation of the Scottish loch scene but using different techniques. The sample was stitched on to a piece of dyed cotton from the batch prepared in Chapter 6.The loch in the foreground was made from lengths of dyed ribbon hand stitched in a ripple effect across the fabric . The surrounding fore-shore was made from different dyed ribbon, merging into free machine embroidery. The background, again using colours for the colour study, was made from a series of different machine stitches. I used sharp points for the far mountains and made these more rounded at lower levels. The pine trees were made from a series of different machine stitches to simulate small, indistinct trees in the middle distance, followed up by trees of greater definition in the foreground. A strip of very fine wire from a wine bottle cork was then stretched across as the one non natural feature in the original photograph.
 IMAGE 7 (each paper is half an A5 sheet)
 IMAGE 7 (each paper is half an A5 sheet)
This is a repeat of an image of decorated papers made in a previous chapter . These were used as inspiration for the next sample.
 IMAGE 8 ( Size 20cms x 13 cms)
 Image 10 (size A4)
Exercises 4 and 5
Image 10 (size A4)
Exercises 4 and 5
 IMAGE 8 ( Size 20cms x 13 cms)
A third , and freer, interpretation of the lochside, inspired by the decorated papers. A piece of dyed cotton was overlaid by strips of sheer and metallics. The sample was then machined in a series of shapes which were present in the original photograph eg. rounded peaks, long narrow ribbons of water, pointed trees etc. Shapes were then burnt back through a number of different layers to reveal different aspect of the colour scheme--this time bright hues of green, lilac, browns and bronzes. The machine stitching was then , in places overworked by toning rayon threads to emphasise the textures.
 CHAPTER 9 (OPTION B)
 CHAPTER 9 (OPTION B)
EXPLORE WITH ABSTRACTED FRAGMENTS.
The starting point and inspiration for this chapter comes from my sketchbook picture Sea Defences along the wash ( See bottom left of image 26 below)
Image 9 . ( Size A4)
(exercises 1-3)
From left to right-(a) is main lines from original,( b) is a plus a flipped image (c) is a plus b plus moving the original tracing from left to right. In doing these three exercises the two key shapes were long thin triangles and crescents
 Image 10 (size A4)
Exercises 4 and 5
Image 10 (size A4)
Exercises 4 and 5Extending the lines beyond the original frame. These exercise served to accentuate the triangle and crescents and also to define a tiny square hub at the centre of the design where all the lines meet. The 'frame' of the whole design is the two very narrow triangles at each long edge. These became a key feature of future design work.
 Image 11( size A4)
 Image 11( size A4)
ADDING COLOUR AND TEXTURE IN A SERIES OF SMALL DESIGNS.
Exercise 1 Mainly light colours but one area dark
 IMAGE 12 (SIZE A4)
 IMAGE 13 (SIZE )A4
 IMAGE 12 (SIZE A4)
Exercise 2
Mostly harmonious colours but one complementary
 IMAGE 13 (SIZE )A4
Exercise 3 Complementary opposites with equal quantities of each.
It was interesting to see how the red dominated here. In the original coloured sketch in my sketch book the red was just used as and additional hue to achieve a rust colour.
 IMAGE 14 (Size A4)
 IMAGE 14 (Size A4)
Exercise 4 Combination of two complementary opposites in differing proportions.
 IMAGE 15 (SIZE A4)
 IMAGE 15 (SIZE A4)
Exercise 5 :Inversion of proportions of 4
 IMAGE 16
 IMAGE 16
Exercise 6 same / similar colours in a group of connecting shapes . ( this is the closest to the original colours.)
 COMPUTER EXPLORATION OF ABSTRACTED FRAGMENTS.
IMAGE 17 (Size A4)
Black and white version of original sketch
COMPUTER EXPLORATION OF ABSTRACTED FRAGMENTS.
IMAGE 17 (Size A4)
Black and white version of original sketch
+of+Copy+of+course+scans016+copy.jpg) Image 18 (Size A4)
Image 18 (Size A4)
 COMPUTER EXPLORATION OF ABSTRACTED FRAGMENTS.
IMAGE 17 (Size A4)
Black and white version of original sketch
COMPUTER EXPLORATION OF ABSTRACTED FRAGMENTS.
IMAGE 17 (Size A4)
Black and white version of original sketch
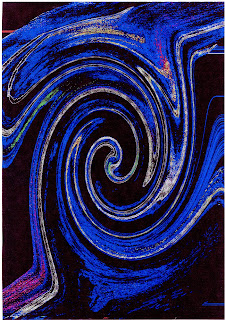
+of+Copy+of+course+scans016+copy.jpg) Image 18 (Size A4)
Image 18 (Size A4)Image 'twirled'
 IMAGE 19 (Size A4)
 IMAGE 19 (Size A4)
Image 'twirled' and wave sine added.
 Image 20 (Size a4)
 Image 20 (Size a4)
Further distortion
 IMAGE 21 ( size A 4)
 IMAGE 21 ( size A 4)
Additional wave patterns added
 IMAGE 22 (Size A4)
 IMAGE 22 (Size A4)
Textured effects added
 IMAGE 23 (size A 4)
 IMAGE 23 (size A 4)
Zig-Zag Distortions. These were added as it became apparent , during this exercise , that Zig-Zag patterns were also present in the original where waves of colours merged.
 IMAGE 24 (Size A4)
 IMAGE 24 (Size A4)
Digital Colour added
 Exercise 25( Size A4)
 Exercise 25( Size A4)
Digital colors inverted
 IMAGE 26 ( Size 1 metre x75 cms)
 IMAGE 27 (Size A40
 IMAGE 26 ( Size 1 metre x75 cms)
DESIGN RECIPE
Shapes translated into paper shapes.
Bottom left hand corner, original sketch. Top left, thin triangles forming the frame containing the two main crescent shapes.
Middle, Negative shapes still framed by triangles
Right hand side shapes of design ' extended beyond the frame' and digital modifications
 IMAGE 27 (Size A40
Hand coloured digital modification.
 USING TEXTURE TO TRANSLATE SAMPLE.
IMAGE 28 ( 30 cm diameter)
USING TEXTURE TO TRANSLATE SAMPLE.
IMAGE 28 ( 30 cm diameter)
 Image 29.(Size A4)
 IMAGE 30. (A4 SIZE)
 USING TEXTURE TO TRANSLATE SAMPLE.
IMAGE 28 ( 30 cm diameter)
USING TEXTURE TO TRANSLATE SAMPLE.
IMAGE 28 ( 30 cm diameter)Distorted scan translated into circular lace knitted sample. Worked in rounds on 4 no.13 needles in fine crochet cotton . 66 rows of pattern from a 1920s pattern book. The resulting sample was not pressed to ensure that it retained its ridged texture.
 Image 29.(Size A4)
Original shape translated into black Vilene and bubble wrap. Although the bubble wrap responded well to being stitched to the Vilene, it did not react well to be handled further or manipulated as the gesso/paint tended to lift from the surface. I anticipate using Tyvek in future to achieve any raised bubble effects required. Long folded strips of vilene added to replicate the triangular frame of originl sktch.
 IMAGE 30. (A4 SIZE)
In this sample I moved away once again from the original shape to the distoreted twirled shapes achieved in the digital examples. I made a backgrond from a layer of muslin overlaid with 3 layers of white tissue soaked in a 50% PVA solution. I then added tiny strips of torn tissue in a circular pattern to raise the texture of the piece. I then used unmixed procion dyes in the original colour study examples and alowed them to mingle on the wet sample.
 Image 31 ( A4 Size)
 CHAPTER 10 OPTION C DESIGN EXPLORATION WITH IMAGE COPIES
IMAGE 32 (A4 SHEET)
4 scanned images of original sketch . (original colors top left other washed over in blue green and red.
CHAPTER 10 OPTION C DESIGN EXPLORATION WITH IMAGE COPIES
IMAGE 32 (A4 SHEET)
4 scanned images of original sketch . (original colors top left other washed over in blue green and red.
 IMAGE 33 (A4 Sheet)
 IMAGE 34(A4 SHEET)
 Image 31 ( A4 Size)
Reverting to the original shape of the 'sea defences' sketch I used a piece of scalloped net curtain dipped in a 70% PVA solution. I then moulded this over the mould pictured in image 57 below.I again used the procion dyes mixed for sample 30 and painted the net on the mould and left it to dry.
Once dry, I added a fan of space dyed organza in the rather more muted colours of the study at the top of the sample and added hand stitiching in heavy thread and ribbon , plus silk tops, again in the paler colours at the bottom of the sample. the black vilene long triangles were then added to the sides.
 CHAPTER 10 OPTION C DESIGN EXPLORATION WITH IMAGE COPIES
IMAGE 32 (A4 SHEET)
4 scanned images of original sketch . (original colors top left other washed over in blue green and red.
CHAPTER 10 OPTION C DESIGN EXPLORATION WITH IMAGE COPIES
IMAGE 32 (A4 SHEET)
4 scanned images of original sketch . (original colors top left other washed over in blue green and red.
 IMAGE 33 (A4 Sheet)
Scanned samples marked out for cutting. Bearing in mind the 'Design Recipe' These were crescents, different shaped triangles and zig zags.
 IMAGE 34(A4 SHEET)
Cut pieces arranged as a collage on a photocopied sheet of original sketch
 IMAGE 35 ( A4 SHEET)
Collage 2
IMAGE 35 ( A4 SHEET)
Collage 2
 IMAGE 36 (A4 SHEET)
 IMAGE 37
 IMAGE 35 ( A4 SHEET)
Collage 2
IMAGE 35 ( A4 SHEET)
Collage 2
 IMAGE 36 (A4 SHEET)
COLLAGE 3
This looks rather like a road leading to a range of montains.
 IMAGE 37
 35 and 36 combined
 IMAGE 38 ( slightly larger than A4)
 IMAGE 38 ( slightly larger than A4)
Although all the pieces in this collage are triangular the black lines within them define the triangular frame lines in the left hand pieces with the crescents in the right hand pieces and one clear zig zag in the bottom right hand corner.
 IMAGE 39 ( A 5 Sheet)
 IMAGE 39 ( A 5 Sheet)
Collage using blue and brown sprayed with glitter craft paint.
 IMAGE 40.
 IMAGE 40.
Collage made from pieces in each of the 4 colourways. A yellow triangle was painted on both in thick acrylic paint and this was then dragged across the whole surface. Additional crescent shapes were etched in with a cocktail stick.
 DESIGN PLUS STITCH
IMAGE 41(A4 sheet)
DESIGN PLUS STITCH
IMAGE 41(A4 sheet) CHAPTER 12 TOWARDS AN EMBROIDERED ITEM
 IMAGE 44 (A4 sheet)
 DESIGN PLUS STITCH
IMAGE 41(A4 sheet)
DESIGN PLUS STITCH
IMAGE 41(A4 sheet)This collage used mostly crescent shaped pieces and related to the distorted scans of the images. One of the muslin tissue circles from image 30 was placed at the centre of an A 4 sheet of handmade paper, the crescent shapes were then arranged in a circular movement arround the edges . The pieces were then tacked into place.
 IMAGE 42 (A4 sheet)
 IMAGE 42 (A4 sheet)
The pieces were stitched into place using different coloured metalllic threads using a looped tailor tacking stitch on the machine. Fronds of toning silk tops were glued and stitched in place at the tips of the crescents. The deepest black lines in the design were emphasised with satin stitch
.In places where there was glitter paint these were covered in thin wadding and then free embroidery in metallic thread was added to increase the texture. This was then painted over with copper bronzing powder. The swirling lines within the background paper,the fine metallic stitiching etc. are all designed to increase the sense of a swirling circular movement and ligthness
 CHAPTER 12 TOWARDS AN EMBROIDERED ITEM
For this item I decided to use the strong shape of the Gondola prow used in Chapter 4 and illustrated below.
IMAGE 43
 IMAGE 44 (A4 sheet)
I used a stencil of both of the sizes of image in 43. I made a fabric from kitchen foil, silver metallic fabric and scraps of seqinned sari fabric.
 IMAGE 45 (A4 sheet)
 IMAGE 45 (A4 sheet)
I also utilised some black gold and silver ribbon
 IMAGE 46 ( ABOUT 10 CMS square)
Once I had cut out the shapes of the gondola prows I decided they lent themsleves to forming into a belt so I used the scraps to make a buckle.
IMAGE 46 ( ABOUT 10 CMS square)
Once I had cut out the shapes of the gondola prows I decided they lent themsleves to forming into a belt so I used the scraps to make a buckle.
 Image 47 . (90 cm circle)
I drew round each of the shapes on the material sandwich and then outlined them in a very fine zig zag
. I used some shapes with the sequinned side up and some with the metallic side.The line of shapes was mounted on ribbon with a loop showing at the front between each shape. The final two shapes were the smaller version and these then threaded through the buckle on the ribbon.


PROPOSAL FOR A RESOLVED EMBROIDERY ITEM

 IMAGE 48 (A2 SHEET)
 IMAGE 49

 IMAGE 48 (A2 SHEET)
 IMAGE 49
Side-on view
 IMAGE 50
 IMAGE 51
 IMAGE 52
 IMAGE 53
 IMAGE 54
 IMAGE 55
 IMAGE 56
 IMAGE 57
 IMAGE 50
 IMAGE 51
 IMAGE 52
 IMAGE 53
 IMAGE 54
 IMAGE 55
 IMAGE 56
 IMAGE 57
PATENTED WAVE MOULD!!!
 IMAGE 58(16X8CMS)
 IMAGE 58(16X8CMS)
FASCINATOR BASE
 CHAPTER 13 STUDY OF CONTEMPORARY EMBROIDERY ARTISTS
INITIAL THREE CHOICES
1. ALISON HOLT.
CHAPTER 13 STUDY OF CONTEMPORARY EMBROIDERY ARTISTS
INITIAL THREE CHOICES
1. ALISON HOLT.
 CHAPTER 13 STUDY OF CONTEMPORARY EMBROIDERY ARTISTS
INITIAL THREE CHOICES
1. ALISON HOLT.
CHAPTER 13 STUDY OF CONTEMPORARY EMBROIDERY ARTISTS
INITIAL THREE CHOICES
1. ALISON HOLT.A machine embroidery specialist and botanical artist. Painting with stitch landscapes, gardens and highly detailed flowers. Her later work is moving to sea scapes and foreshores with pebbles and cliff faces, an area of particular interest to me. I was able to visit her stall at the Chelsea flower show and have access to her web site-www.alisonholt.com
. She also appears in demonstrations on You tube
.
 The pictures above are from commercially available cards. her book 'Machine Embroided Flowers' is an inspiration even it it only serves to make one weep at ones own incompetence when compared to her skill!!
2. Yvonne Brown
The pictures above are from commercially available cards. her book 'Machine Embroided Flowers' is an inspiration even it it only serves to make one weep at ones own incompetence when compared to her skill!!
2. Yvonne Brown  3. Francoise Tellier-loumagne.
 Additional Bibliography for Module 1.
 The pictures above are from commercially available cards. her book 'Machine Embroided Flowers' is an inspiration even it it only serves to make one weep at ones own incompetence when compared to her skill!!
2. Yvonne Brown
The pictures above are from commercially available cards. her book 'Machine Embroided Flowers' is an inspiration even it it only serves to make one weep at ones own incompetence when compared to her skill!!
2. Yvonne Brown A Norfolk based trained Art historian, teacher, quilter and embroiderer. her speciality is in creative textiles, many using the medieval period as inspiration . She mounted a major exhibition ,with others, at Ely Cathedral last year and continues to participate in the open studios scheme.One of her main techniques is using heat distressed sheers layered up on a vilene base on which the pattern is drawn to bee sewn from the reverse. Layers are built up on a cotton base with acrylic felt which can then be burned back though various surface layers.
Although much of her subject matter is not in parallel with mine I see the potential of utilising her techniques to achieve different effects with my themes
The image below shows a number of post cards of her work and I have access to her web site http://www.yvonnebrown.co.uk/. I have been fortunate to attend her local workshops.
,
 3. Francoise Tellier-loumagne.
Based in France, her main publications include The Art of Knitting, The Art of embroidery and The Art of Felt. She is a textile artist and teacher and is innovative and creative in her examples, based on a sound foundation of traditional approaches. The images below are from her book the Art of Embroidery and I feel that they demostrate the two ends of her spectrum. On the one hand there is a sumptuous image of stitched leaves using wonderfully blended colours and traditional embroidery stitches ,while on the other there is a thoroughly modern approach to a foreshore land/sea scape ,using bonding and fusing techniques to achieve the effects.
I particularly like the way in which she uses the manipulation of fabric as the base for many of her embroidered effects. Her willingness to combine knitting, embroidery and basic sewing techniques within one piece is especially appealing to me. I am sure that this artist will repay further study.

 Additional Bibliography for Module 1.
Ruth Isset. The Use of Colour on Cloth.
Specialist Web site;
Andrew Newland Teaching Drawing and Design. Particularly good on colour mixing. An excellent resource
Exhibitions Attended during the course of module 1
Turner and the Masters : Tate Britain. Excellent for viewing the reworking of the same theme by a number of Artists. Separate exhibition on Turner's Use of Colour and Line is particulary instructive.
Harrogate Knitting and Stitching Show..
Time taken for Module 1 Chapters 7-13.
Typing up work and organising samples10 hours
Drawing designs and working samples 60 hours.
Costings for samples etc
Fabrics £2
Threads, ribbons ec. £3
