 SILHOUETTE OF THE HEAD
Image 2 (size A2)
I chose a strongly African silhouette for this exercise and made a number of black and white images in different sizes. Image 3 (size A3)
 Image 3 (size A3)
The silhouette frames.
 Image 4 ( size A3)
 Image 4 ( size A3)
Using an A5 size silhouette I made a series of outlines'nose to nose'
 Image 5 ( size A3)
 Image 5 ( size A3)
Using the same silhouette I made a series of interlinked outlines.
 Image 6 ( Size A3)
 Image 6 ( Size A3)
These are a series of etching type outlines. A glass plate was covered in layers of soap which were left to harden overnight. The silhouette was then drawn round in water soluble pencils and a sheet of damp paper was pressed over the top. This caused the pencil marks to transfer on to the page. Different effects were achieved depending on how close the etching marks were on the plate.
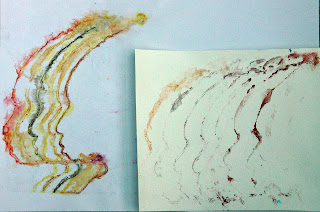 Image 7 (size A2)
 Image 7 (size A2)
I made a decorated starch paper and used this to cut out positive and negative shapes / cross sections of the silhouette to form new designs on a background of fibre paper.
 Image 8 (size A 3)
 Image 8 (size A 3)
 Using a different starch paper two opposing versions of the silhouette were cut into strips
and placed on the white background.
 Image 9 (size A3)
 Image 9 (size A3)
This image uses the same strips but on a red silk background.
 Image 10 ( size A2)
 Image 10 ( size A2)
Returning to a black and white theme I printed paper copies of photographs of embroidery/blackwork/cut work together with my own patchwork quilt and cut various shapes from the silhouette. The effect in the bottom right looks rather like a Tudor headdress.
 Image 11 (size A2)
Continuing the black and white theme.
Image 11 (size A2)
Continuing the black and white theme.
 Image 12 (Size A3)
 Image 15 ( Size A4)
  Image 16 ( size A4)
 Image 11 (size A2)
Continuing the black and white theme.
Image 11 (size A2)
Continuing the black and white theme.
 Image 12 (Size A3)
Moving away from black and white I made this starch paper in what semed to me to be hot African colours and cut shapes from the silhouette to fasten on to black paper.
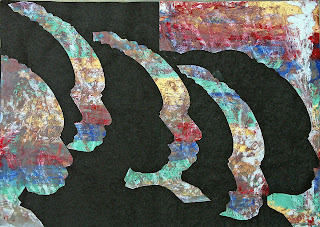 DESIGN DEVELOPMENT FROM SILHOUETTES
Image 13 (size about A2)
DESIGN DEVELOPMENT FROM SILHOUETTES
Image 13 (size about A2) Image 14 (size A4)
 DESIGN DEVELOPMENT FROM SILHOUETTES
Image 13 (size about A2)
DESIGN DEVELOPMENT FROM SILHOUETTES
Image 13 (size about A2)In contrast to the hot colours used in the starch papers I decided to move away from the African colour palette associated with the silhouette. I also wanted to use a more fragmented style with less definition and for this exercise I used a slightly smaller silhouette.
For the first stage I drew roughly round the silhouette on a pale net backing ,covered in bondaweb, to form 6 individual pictures. I then covered the outlines with lengths of thread of varying thicknesses and , for the darkest green sample, very fine shavings of wire. In some of the samples I added Angelina fibres for additional sparkle and in some filaments of sik tops were used to increase the frayed nature of the edges.
I then ironed each of these bonda web backed circles on to ovals of toning dyed fabrics. The silhouettes were then stitched round leaving the rough ends of threads etc. trailing over the edges. The individual silhouettes were then placed on to circles of toning tissue paper and a lacy machine edging stitch was used to attach them.The sample was photographed on a watered blue silk background.
A number of thoughts emerged from this experiment.
The thicker and darker the threads added to make the base fabric the less definition there is in the resulting outline.
The resizing of the silhouettes to a smaller version means that the original strong African image is blurred. The use of the pale green/ tourquoise colour palette , together with this rather less distinct outline , makes the heads more reminiscent of neo classical head shapes from the 18th century.
 Image 14 (size A4)
Shapes within the face.
A series of drawings from the designs of textile and other artists over the centuries.
 Image 15 ( Size A4)
Drawings from a photograph , exaggerating features.
This was a series of drawings made from a photograph of Elvis Presley.
The top left is the closest to the original. The top right has exaggerated the coif of hair at the top and elongated the chin at the bottom.
The bottom left has a different exaggeration of the hair line and the addition of heavier lips.
The bottom right has the addition of heavy rimmed galsses which were a feature of later pictures of Elvis.
A series of photocopies were then made of these drawings.
 Image 16 ( size A4)
The hair seemed to be the main feature of the individual pictures so the images were cut up to focus on sections of hair. These were then put on to a black background
.
 Image 17 ( size A4)
 Image 17 ( size A4)
In this design the images were cut up into guitar shapes which were then mounted on stiff black paper.
 Image 18 (size A5)
 Image 18 (size A5)
In this image the guitar shapes were used again but this time they were mounted on transfer painted paper in pastel colours. The effect of this pale background was to lose the definition and impact of the originals.
 Image 19 (Size A5)
 Image 19 (Size A5)
In the original set of 4 images of Elvis.(in image 15) the effect of the exaggeration in the top right image was to make the face look oriental. I chose to mount a cut out of this face on a page which I decorated with Japanese print images.
 DRAWING EXERCISES BASED ON THE SECTIONS OF THE FACE.
Image 20 (size A4)
DRAWING EXERCISES BASED ON THE SECTIONS OF THE FACE.
Image 20 (size A4)
 DRAWING EXERCISES BASED ON THE SECTIONS OF THE FACE.
Image 20 (size A4)
DRAWING EXERCISES BASED ON THE SECTIONS OF THE FACE.
Image 20 (size A4)This is the image of my face drawn with a wax crayon while looking in a mirror.
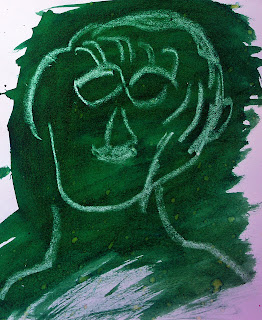 Image 21 ( Size A4)
Self portrait (my Blue period!!!)In Oil pastels.
Image 21 ( Size A4)
Self portrait (my Blue period!!!)In Oil pastels.
 Image 22 (Size A4)
 Image 23 ( Size A4)
 Image 21 ( Size A4)
Self portrait (my Blue period!!!)In Oil pastels.
Image 21 ( Size A4)
Self portrait (my Blue period!!!)In Oil pastels.
 Image 22 (Size A4)
A dark self portrait.
Using remants of procion dyes with thickener.
 Image 23 ( Size A4)
A lighter mood self portrait using water soluble crayons.
 Image 24 (size A4)
 Image 24 (size A4)
A self portrait using torn half dark and half light images with one the right way up and the other upside down.
 Image 25 (Size A3)
 Image 25 (Size A3)
This version again uses half dark and half light images but they are cut around the original African silhouette shape and interwoven.
 Image 26 (Size A3)
 Image 26 (Size A3)
In this sample long strips have been cut through the dark and light images but not all of them have been used, giving an elongated appearance to the faces even though they are exactly the same length as in the previous portraits. The strips have been woven through a metal cooling tray to give an imprisoned feeling to the design.
 Image 27 ( size approx A4)
 Image 27 ( size approx A4)
 Having cut up lots of copies of the light and dark portrait images for the samples above I was left with lots of small off cuts. I had a papier mache mask and so I covered this with cling film and proceeded to cut up the majority of the offcuts into samller pieces, leaving some with clear features for the last layer. I layered them over the surface of the cling film covered mask with silghtly diluted PVA. I used similar bands of colour, working from the top of the head to the point of the chin. For the final layer I added some spectacle, eyebrow and mouth shapes, saved from my original pile. Once finished the mask was coated with PVA and left to dry on the mould.
 CHAPTER 13 RESOLVED SAMPLE.
Images 28 and 29 ( Head A4 size)
CHAPTER 13 RESOLVED SAMPLE.
Images 28 and 29 ( Head A4 size) Once the sample was completed I made a gold frame by covering a cut out rectangle of cotton wadding backed with stitch and tear. I used hot colours in the bobbin as in the 'alchemy' samples earlier in the module.
 Time taken;
 CHAPTER 13 RESOLVED SAMPLE.
Images 28 and 29 ( Head A4 size)
CHAPTER 13 RESOLVED SAMPLE.
Images 28 and 29 ( Head A4 size)For the resolved sample I decided to work with the African silhouette of the head. Having worked in paper with a variety of shapes intercut from the original silhouette I wanted to return to the strong African outline. I began ,therefore ,with a silhouette drawn on to brown silk dupion
bonded to a sheet of cotton felt. I wanted to have a sightly relief surface when the sample was finished and the depth of the felt added to this effect.
I returned to the metallic theme and I decided to reinforce the African image by using a variety of metallic and sheer fabrics in the shape of the African continent. The use of mainly copper and gold metallic fabrics also reflected the presence of gold and copper mining on the African continent
For the first layer each shape was drawn onto individual oblongs of fabric. Each outline map was then sewn down individually with a straight machine stitch on to the prepared background fabric. After this initial sewing the excess fabric around the edge of each map was burnt away by the tip of a fine tipped soldering iron. Finally the outline of each map was worked over with a fine zig zag . The sample was then built up in the same way , layer by layer ,until all the background fabric was covered. I followed the outline of the silhouette and in some places the shape of the map closely followed the outline while, in others, I allowed the outlines of the maps to overhang the silhouette. Once the whole series of layers had been completed I then redrew the silhouette and worked over it with a larger zig zag than that used for the maps.
.
 Once the sample was completed I made a gold frame by covering a cut out rectangle of cotton wadding backed with stitch and tear. I used hot colours in the bobbin as in the 'alchemy' samples earlier in the module.
 Time taken;
Resolved sample 16 hours
Photography 2hours
Typing and editing blog 2.5 hours
Preparing decorated papers 4hours
Self portraits and subsequent designs 6 hours
Tissue paper circle silhouette designs 10 hours
Elvis Presley designs 2.5 hours.
Researching and drawing 2 A4 sheets of face designs by various artists 7 hours.


