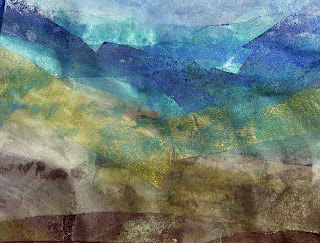
 IMAGE 2. SIZE 16 ins X 13 ins This is the second stage in the development of the blue/ green fabric. A layer of painted bondaweb has been ironed on to the sheers and metallics. As all the layers are synthetic the final panels can be cut out from this fabric with a fine tipped soldering iron to seal all the layers at the edges and create a crisp outline to each one. Once the panels are cut out some machine stitching will be used both to highlight some of the features of the fabric and ,on the other hand, to soften any remaining hard lines.
Following on from previous comments some additional textural elements have been added to the first blue/green panel to start to move away from the linear approach originally employed.

IMAGE 4. SIZE 12 ins X 8 ins.
As in the above sample the first purple/ blue panel has been reworked to blur some of the lines.
The first two blue /green textured panels cut from their background fabric, individually mounted on pelmet vilene and photographed against the (as yet unstitched)fabric for the smooth blue/green panels.
.

IMAGE 6. SIZE 16 ins X 13 ins
Similarly the first purple/ blue textured panel has been cut out, mounted and photographed against its background fabric. This fabric has been made in exactly the same way as the blue/ green examples above but, as before, it does not yet have any over- stitching.

CHAPTER 7 TRANSPARENT POCKETS.
Transparent heavy gauge film was cut into squares. The top sheet was then stretched over a wine bottle top to form a smaller round pocket. This pocket was then filled with thinned acrylic paint and the second square of film was then moulded to it and sealed with a soldering iron.The square pockets were then joined together using glue trails , painted after cooling.
Dyed nylon mesh was formed into a square and the edges 'bound' with organza strips sealed with a soldering iron. Lengths of gummed silk, dyed in the same coulours ,were threaded
In the top black and red sample the black background fabric is a nylon square which was marked into 4 smaller squares. A button was then sewn into the centre of each square. The top red layer is packaging material from a group of tangerines. This was bonded with heat to the background black fabric around the edges and along the lines of the squares. Red merino wool fibres were then dry needle felted along the dividing lines of the smaller squares and a different red button was sewn at the centre.
In the bottom sample polythene film was used. A long rectangle was cut and this was then folded in half. A series of pasta twists were then placed on the film and a fine tipped soldering iron was used to make a series of holes around each twist. This partially sealed the polythene layers together. A heavy cotton thread was then dyed in the colours of the pasta and used to stitch round the edges of each pocket. The word PASTA was then stitched underneath in the same yarn.
A triangle was cut from wire mesh and formed into a prism. Stiffened muslin was then used to form a prism shaped covering and threads were pulled to replicate the lines in the wire mesh. The muslin was then covered and stitched to a layer of white organza. This covering was then stiched into place over the surface of the wire prism leaving a hanging loop at the apex. Lengths of white cotton yarn were then treaded through, tied, and left to hang at the sides.


